Make any AI project business-ready in one prompt. Try Wix Headless →
You've built your website. Now you need to get it out of your browser or AI coding tool and onto the web where people can visit it. The steps depend on how you built it. A website builder can publish your site for you, while an AI-generated or custom-coded site may require hosting, a domain and backend services.
This guide covers what to check and how to get from a finished website to a live URL, including where a headless solution fits in.
Go from code to live site with Wix Headless. Upload or drag in your HTML, CSS and JavaScript files to get your site live with a shareable URL. Wix handles the hosting and infrastructure, and you can add eCommerce, bookings, CMS, payments and more with a single prompt.
TL;DR: how to publish a website
Once your site is ready, there are a few key decisions to make before you share it with the world, from choosing where it will run to making sure visitors can reach it and search engines can find it.
You'll learn:

What does it mean to publish a website?
Publishing a website means making it available on the web at a URL that visitors can access. Until then, your site may exist only as a draft, preview or local project that isn't publicly accessible.
Draft vs. published
Most websites move through three stages before visitors see them. First, the site lives on your computer, where it opens at an address like localhost that only works on your machine. Next, it may sit on a staging or preview URL where you can test it and share it with others. Finally, it moves to a public URL that visitors can access.
This distinction matters for AI-generated sites, too. A working preview doesn't necessarily mean your site is published. If the site is still running on your computer or inside an AI tool, you'll need to get it running on a host that can serve it to visitors.
Wix Headless drag and drop deploy lets you upload your HTML, CSS and JavaScript files and get your site live with a shareable URL.
What do you need before you publish your website?
Publishing comes down to 4 things. Depending on how you build your site, some of them may be included together.
01. Your website
For a coded site, that means the files that make it up, usually HTML, CSS and JavaScript plus images, fonts and other assets. If you use a website builder or CMS, your pages and content live inside the platform, so you don't handle the files directly.
If an AI tool built your site, the files it gave you may not be the final version yet, and the AI section below explains how to tell.
02. A place to host it
Hosting is where your website files or application run so visitors can load your site. Website builders include hosting, while a CMS or coded site may require you to choose a host yourself.
Learn more: How to choose web hosting

03. A URL
Every published site needs a web address. Most platforms give you a free URL to start, and you can connect a custom domain when you're ready to share the site more widely or use it for a business.
04. HTTPS
HTTPS encrypts the connection between visitors and your site and shows that the connection is secure. You rarely need to buy or install a certificate yourself, since most modern hosts and website builders set HTTPS up automatically.
Worth knowing: If your site shows a "Not secure" warning after you connect a domain, the SSL certificate may still be provisioning or your domain may not be configured correctly. Check that your domain points to the correct host, then follow your host's SSL troubleshooting steps if HTTPS doesn't become active.

How to publish your website without coding
If you built your site with a website builder or CMS, you can usually publish it without dealing with code, website files or servers. The platform handles the technical side while you prepare the site, publish it and check that everything works.
If an AI tool built your site, the next section goes deeper on the steps that work differently.
01. Choose where your site will live
Your website needs a platform that keeps it online so people can visit it. If you haven't chosen one yet, a website builder is usually the simplest option because it lets you build, host and publish your site in one place.
You may also use a CMS if you want more control over how you manage your content. A managed headless platform is another option if your website was built separately from the system that manages its content and business features.
The important thing is to choose a platform that supports the type of site you want to run and the features you need.
Read more:

02. Get your site ready
Before you publish, go through the site from a visitor's point of view. Make sure your pages are finished, your text and images are correct and your contact information is up to date.
Check the site on your phone as well as your computer. Make sure the menus, buttons and links work and remove anything that still looks unfinished, such as placeholder text, sample images or test pages.
It's also a good time to add basic information that helps search engines understand your pages, such as page titles and descriptions.
03. Publish your site
Publishing makes your website available for other people to visit. With most website builders, you simply click Publish and the platform takes care of the technical work.
After you publish, the platform will give you a URL for your site. Open it in a new browser window and check that you're seeing the live version rather than the editor or preview.
You can usually start with the free URL provided by your platform and connect your own domain later.
04. Connect your features
Some websites need more than pages and text. You may have a contact form, appointment booking, accept online payments, newsletter signup, member login or another feature that needs to be connected before the site is ready.
Set up and test these features before sharing your site. If you're using a website builder, many of these features can be added through the platform itself rather than set up separately.
05. Test your live site
Don't stop at the preview. Visit the published URL and use the site as a visitor would.
Check that:
Every important page opens
Navigation and links work
Images and videos load correctly
The site looks good on a phone
Contact forms send successfully
Buttons do what they should
Your 404 page appears when a page doesn't exist
Your site loads over HTTPS without a security warning
Payments, bookings or other important actions work from start to finish
If something doesn't work, fix it in the editor and publish the changes again. Then test the live site once more.
06. Connect your domain
You can publish a website without buying a domain. Your website builder can give you a free URL, such as a platform-branded web address, that lets people visit your site.
If you want your own address, start with domain registration to get a custom domain such as yourbusiness.com. You can register a domain through a domain provider, then follow your website platform's instructions to connect it.
After connecting the domain, visit it yourself and make sure the site loads correctly over HTTPS. If you recently registered or connected the domain, it may take some time before the change works everywhere.
Free URL vs. custom domain
A free URL is a quick way to get your site live without buying a domain. It's useful for testing, personal projects or sites you aren't ready to give a permanent address yet.
A custom domain gives your site an address of its own, such as yourbusiness.com. It's easier to share and remember and you can usually keep the domain if you move your site to another platform.
Worth knowing: You don't have to announce your site the moment you publish it. Share the live URL with a few people you trust first, ask them to try the important parts and fix any problems before you send it to everyone.

How to publish a website built with AI or custom code
If you built your site with AI or wrote the code yourself, publishing usually involves a few more steps. You need to get the code running on a service that can serve it to visitors, connect any backend services the site needs and make it available at a public URL.
A working site in your code editor or AI tool isn't necessarily a published site. Before you go live, you may need to choose where the site will run, deploy the code and test that everything works outside your development environment.
Here’s what to check before you put your AI- or custom-coded site live, from figuring out what you have to choosing how to deploy it. If you want a simpler, less technical way to get your site live, Wix Headless offers another option. See how it works below.
01. Did the AI give you a website or a project?
This is the first thing to figure out. Open the folder you got from your AI tool or developer and look at the files inside.
A finished website might look something like this:
index.html
styles.css
script.js
images/
You can usually upload files like these directly to a host and make the site live.
A project that still needs to be built might look more like this:
package.json
src/
components/
vite.config.js
These files are the source code used to create the website. They may need to be built into the files that visitors' browsers can load before you can publish the site.
A file called package.json is a common sign that you're looking at a JavaScript project. Open it and look for a script called build. If you see one, the project will usually need to be built before it can be deployed.
How to build your project
If your project has a package.json file and a build script, you may need to build it before you can put it online. Building turns the project's source code into the files your host can use to run the website.
Here's the basic process:
Install Node.js. Download and install the current LTS version of Node.js on your computer.
Open your project folder. Find the folder that contains package.json.
Open a terminal in that folder. On Windows, right-click the folder and choose Open in Terminal. On Mac, open Terminal and use cd to move into the project folder.
Install the project's packages. Run: npm install
Build the project. Run: npm run build
Find the finished files. Look for a new folder such as dist, build or out. This is usually the folder you'll deploy.
The exact folder name and build command can vary by framework. If npm run build gives you an error, check the scripts section in package.json or the instructions provided with the project.
Read more: How to host an AI-built site

02. Can you upload the files directly?
Sometimes. If you have a finished static website, you may be able to upload the files to your host and go live. If you have a project that needs to be built, or a site that depends on a database or other services, you'll need a hosting setup that can handle those requirements.
Before choosing where to host it, ask yourself:
Does it need to be built? Check if the project has a build command, as explained above.
Does it use a database? If so, you'll need somewhere to store and retrieve that data.
Does it use an API? You'll need to make sure the API is available when the site is live.
Does it need passwords or secret keys? These should be stored securely as environment variables, not in the public website files.
Does it have logins, payments or bookings? These features may need a backend service to work properly.
The more your site depends on these services, the more you'll need to check that your hosting setup supports them.
Learn more: How to host a website you built with ChatGPT

03. Know the difference between upload, build, deploy and publish
You'll see these four words often when you're putting a coded site online. They describe different parts of the process.
Upload: Move your website files from your computer to a hosting service.
Build: Turn your project's source code into files that can be used to run the website.
Deploy: Put the built website or project into its hosting environment so it can run.
Publish: Make the website available for people to visit.
A simple static site may only need to be uploaded. A project built with a framework may need to be built first and then deployed to a host that supports it.
04. Check the parts behind the website
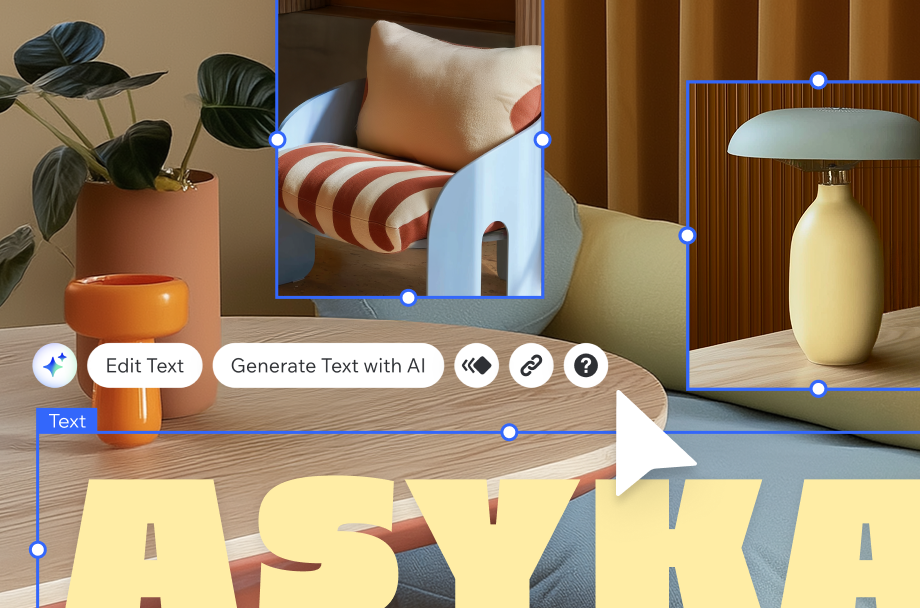
A website can look finished in a preview but still have missing pieces behind the scenes. This is especially important if your site lets visitors do more than read pages. Think of it this way:
Frontend: The part visitors see and use, such as pages, menus, buttons, forms and animations.
Backend: The part that handles things behind the scenes, such as user accounts, databases, payments, bookings and form submissions.
For example, an AI tool can create a checkout page that looks and works like a real checkout. But the page still needs a payment service connected to it before customers can actually pay.
Make sure your site works
The same applies to other features. A contact form needs somewhere to send the message. A login page needs a system that can create and verify accounts. A booking page needs access to real availability.
If your site uses API keys, passwords or other secrets, store them as environment variables in your hosting settings. Don't put secret keys directly into frontend code because visitors may be able to see them.
AI-generated code can look finished even when some of these connections are missing. Before you publish, test every important feature using the live setup, including forms, logins, payments and bookings.

05. Choose how to get your site online
Once you know what your project needs, choose a deployment method supported by your host. You don't need to understand every option. Pick the one that fits your project and how you plan to update it.
Common options include:
File manager: Upload your website files through your host's dashboard.
SFTP: Transfer files from your computer to your host using a file transfer app.
Git: Connect your code repository so your host can build and deploy new versions when you push changes.
Drag and drop: Drop a folder or ZIP file into a hosting service that supports this method.
For a simple static site, uploading the files may be all you need. For a framework project, connecting a code repository or using a deployment service may be easier because the host can build and deploy the project for you.
After deployment, open the live URL and test the site as a visitor would. Check your pages, links, forms and other important features, then look through your public code to make sure you haven't accidentally exposed an API key, password or other secret.
How to publish a website with Wix Headless
If you built a site with AI or custom code, you don't have to figure out hosting, deployment and business features separately. Wix Headless gives you a simpler way to get your coded frontend online and connect it to Wix.
For a finished static site, you can upload your files directly. If your project needs to be built first, build it before uploading the output. Here's how to get started.
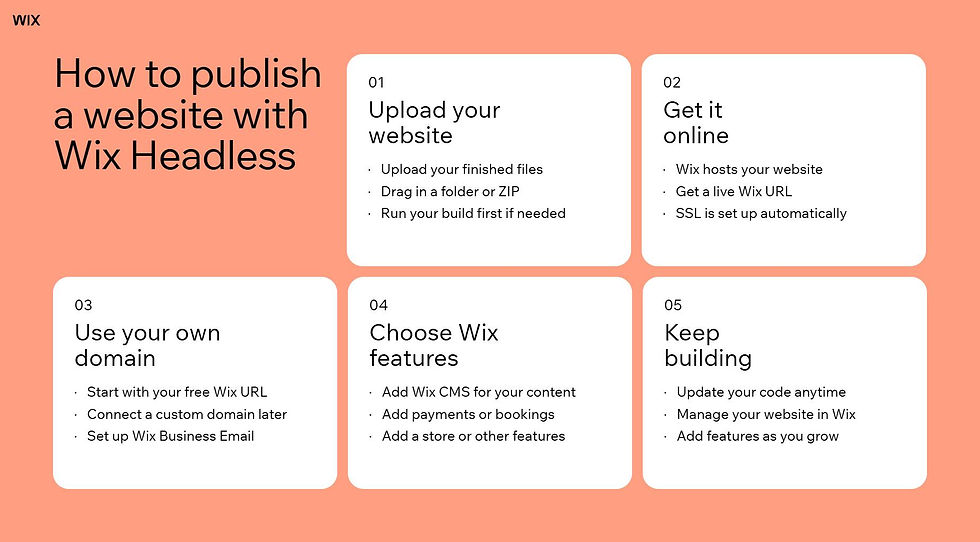
01. Upload your finished website
Go to the Wix Headless drag and drop deploy page and upload your finished website files. You can drag in a folder or ZIP file, or select the files from your computer.
If your project uses a framework and you built it first, upload the build output rather than the original project files. Wix serves the files you upload as they are, so it doesn't run the build for you.
There's no terminal or installation required for this upload method. Once the upload is complete, Wix hosts the site and gives you a live Wix URL.
Good to know: This upload method is for static websites. If your site needs its own backend code, you'll need to use the Wix CLI instead.
02. Get your site online
Once your files are uploaded, Wix hosts them on its infrastructure with a global CDN and automatic SSL. Your site is released on a Wix URL, so you can open it, test it and share it without setting up a separate hosting service.
You can start for free and connect your site to Wix business solutions as you develop it.
03. Connect a custom domain
When you're ready for your own web address, connect a domain to your project. A custom domain requires a Premium plan. You don't need to set up an SSL certificate yourself. Wix-managed Headless provides automatic SSL for your hosted site.

04. Add the features your site needs
Once your frontend is live, you can connect Wix business solutions such as CMS, Stores, Bookings, Events and memberships. You can manage much of the business side from your Wix dashboard without changing your frontend code.
You can also use AI tools to help connect Wix features to your site. For example, you can ask an AI coding agent to add a store, bookings or a blog to your project.
For features such as checkout, bookings and other complex flows, Wix also provides hosted pages and APIs, so you don't have to build every piece yourself.
Read more: How to add an online store to AI-built site

05. Keep managing your site
Your custom frontend stays separate from the Wix dashboard, so you can keep working on the code while managing your business data in Wix.
From the dashboard, you can manage things such as products, bookings, blog posts, forms and members. Changes you make there can appear on your live site without you having to redeploy the frontend.
When you change your code, you can build and deploy the updated version through the Wix CLI. If you're working with an AI coding agent, you can also ask it to publish the changes for you.
Expert tip from Anat Fennig, UX Lead at Wix:
"There's no developer pricing, no fees for API calls, no enterprise tier you have to unlock. You connect for free and upgrade when you're actually ready to launch. We built the pricing to match how AI builders actually work, fast iteration first, monetization when the product is ready."
How domains, hosting and DNS get your website online
These terms are easy to mix up, but the relationship is simple.
Hosting. The service where your website runs.
Domain. The web address people use to find your site.
DNS. The system that tells a domain where to send visitors and other services.
HTTPS. The secure connection between visitors and your site.
When you connect a domain to your website, you'll usually need to add DNS records at the company where your domain is registered. Your host will tell you which records to add, such as an A record or CNAME record. Some hosts instead ask you to change your domain's nameservers so the host manages your DNS.
Once the domain is connected, your host or another certificate provider can set up an SSL certificate, which allows your site to load over HTTPS.
DNS changes don't show up everywhere at once. Depending on the record and how long networks cache the old information, your new settings may work for some visitors before they work for everyone.
How much does it cost to publish a website?
You can publish a simple website for little or no cost, but the price goes up when you add a custom domain, more hosting resources or features such as payments and databases. For a basic site, expect to spend around $10–$20 a year for a domain and anywhere from $0 to $30+ a month for hosting, depending on the platform and what your site needs.
Here's what typically adds to the total:
Domain: Usually around $10–$20 a year for a standard domain, although some extensions cost more.
Hosting: Can range from free to $30+ a month for a basic site, with more complex sites costing more.
Business features: Payments, bookings and other features may have monthly fees or transaction fees.
Backend and database services: Simple projects may have free tiers, while larger or more active sites can cost more.
Professional email: Often costs around $6–$30+ per user per month, depending on the provider and plan.
Third-party APIs: Some APIs are free up to a certain usage level, while others charge based on how much you use them.
An all-in-one platform can combine several of these costs into one plan, which can make the total easier to predict.
Worth knowing: check renewal prices, not just first-year prices. Domains and hosting plans are often discounted for the first term and renew at a higher rate.
Get the details: Web hosting cost
What to do after your website goes live
Right after launch
Open the site on a desktop and a phone, submit every form and confirm HTTPS works on every page. Test any redirects, click through your most important links and make sure your analytics are recording visits.
For search
Search engines find new sites on their own eventually, but you can help them discover your pages sooner. Verify your site in Google Search Console, submit your sitemap and use the URL inspection tool to check if key pages are indexed. A sitemap helps Google find your URLs, but it doesn't guarantee they'll be indexed. Make sure your robots.txt file isn't blocking important pages and that each page points to the right canonical URL.
For maintenance
Renew your domain before it expires, monitor uptime, back up important content and recheck forms and integrations every so often. For AI-generated projects, keep dependencies updated and watch for security patches, since generated code often pulls in libraries you didn't choose yourself.
Worth knowing: indexing takes time. A brand-new site can take days or weeks to appear in search results, even when everything is set up correctly. If key pages are still missing after a few weeks, the page indexing report in Search Console will usually tell you why.
How to publish a website FAQ:
Can I publish a website for free?
Yes. Many website builders and hosts let you publish on a free URL on their domain, and static files can often be hosted at no cost. You'll usually start paying once you add a custom domain or business features like payments.
Can I publish a website without a domain?
Yes. You can publish many websites using a free URL provided by your website builder or hosting platform. You only need a custom domain when you want your own web address.
Do I need hosting to publish a website?
Yes, every published website needs hosting because its files have to live on a server that visitors can reach. Website builders and managed platforms include hosting, so you may not need to set it up separately. With a CMS or a coded site, you typically choose a host yourself.
How long does it take for a website to go live?
On a platform URL, a site can be live within seconds of uploading or clicking publish. Connecting a custom domain takes longer because DNS changes need to spread across the internet, and timing varies by record and provider. Showing up in search results is a separate process that can take days or weeks.
How do I publish a website generated by AI?
Start by checking what the AI gave you. If it's a folder with an index.html file plus CSS, JavaScript and images, you can upload it to a static host or a drag and drop deploy service. If it's a project with a package.json file, check if it needs a build and deploy it to a host that supports its framework. Then connect any backend services it needs, add your domain and test the live site.
Why isn't my website showing up on Google?
New sites take time to be discovered and indexed, often days or weeks. Verify your site in Google Search Console, submit your sitemap and check that your robots.txt file or a noindex tag isn't blocking pages. If key pages still don't appear, the page indexing report in Search Console usually explains why.


