
- Karen Chin
- Jun 16, 2022
- 5 min read

Animations can be a great addition to your site. They help increase analytics for engagement, contribute to a better user experience by making your site more “human centric”, and demonstrate to your users that the site is working behind the scenes. In this guide, we’ll show you how to add stunning animations to your Wix site using Velo and the Timeline API.
Website engagement has historically been measured in a few different ways. These include bounce rate (a single page session on a site), average session duration (the total duration of all sessions in seconds over a number of sessions), time spent on a page, and Call To Action (CTA) conversions (how frequently the site gets through clicks on a CTA link or button). These marketing terms might not seem too exciting, but you can build on these Key Performance Indicators (KPIs) for site engagement by integrating fun animations and microinteractions to liven up your site without completely overhauling the design. Visitors are more likely to stay on pages with exciting animations and other elements that encourage them to explore. This can increase the average session duration, decrease the bounce rate, and increase clicks on the site. All of these things work together to increase interactivity and help make your site more fun.
Animations can also contribute toward creating a satisfying User Experience (UX). They can be used to add microinteractions (small/subtle animations on site elements that can be whimsical), communicate a brand aesthetic, and display feedback to the visitor. Of course, usability is extremely important, but it’s also imperative to strike a balance between functionality and design, which can contribute to good UX and make the site feel more human. It’s also important to make sure that the animations you add to your site are intentional without being over-the-top, so as not to overwhelm your visitors with chaos and disorientation from too many random animations. Subtle animations can also remind viewers that there are actions happening behind the scenes. A loading screen, for example, helps communicate that your website is still loading, while a small animation can help give visitors a small sense of satisfaction after completing a specific action on your site.
The Timeline API makes it easy to add animations to your Wix site and can help with accelerated development. It can help you avoid spending too much time writing redundant CSS or HTML markup, all while lending a certain clarity and convenience to your design. Unlike the CSS-animations property, which requires you to write multiple prefixes to make your animations compatible with each web browser you want to support (i.e. -webkit, -mos, -ms, etc.), the Velo Timeline API ensures that your animations are supported by all major browsers (save for Internet Explorer, which has been deprecated). Adding your animation once gives it cross-browser support, so you don’t have to worry about whether or not your animations are compatible with a specific browser. The Timeline API also allows you to take control of your animations with code, helping save time that might have once been spent exporting gifs or using complicated compression programs. Your site won’t just load faster, but will also take less time to create.
Using the Timeline API on Your Site
Now that you understand why we would want to use animations on our sites, let’s talk about how to implement the Timeline API on your Wix site.
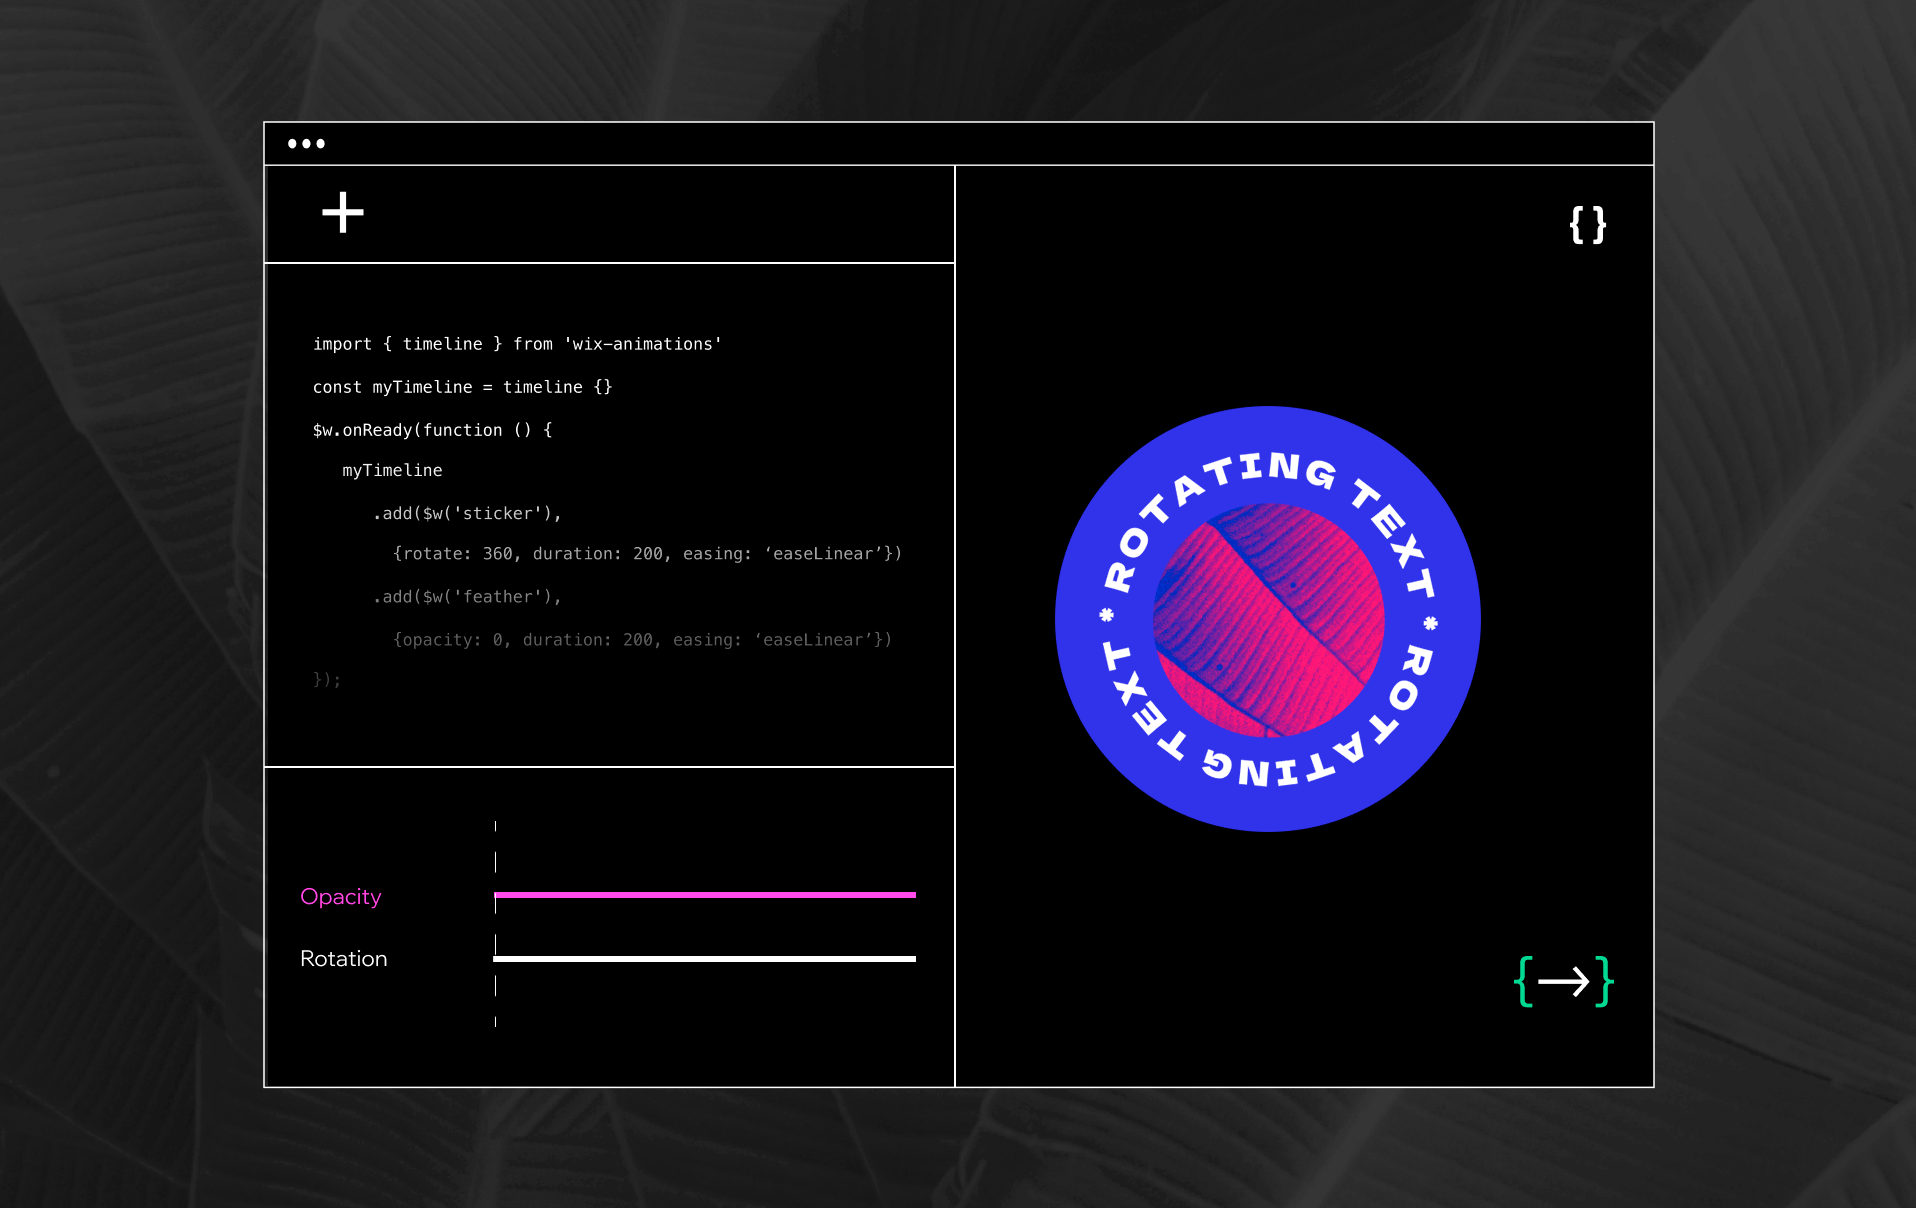
While it might feel like a throwback to the early days of the web, rotating text seems to be making a comeback in the contemporary web development landscape. Today, I’ll walk you through how to implement the animation below using the Timeline API.

First, make sure “Dev Mode” is turned on for your Wix site. To do this, move your cursor to the top-left corner of the page, where you should see a dropdown labeled “Dev Mode” in the uppermost menu. Inside of this dropdown, you’ll see a blue button labeled “Turn on Dev Mode.” Clicking this button will open a code editor and Integrated Development Environment (IDE) in the lower-half of the page. This code editor allows you to start coding with Velo, Wix’s full-stack development platform.

Next, you’ll want to import the `timeline` object from the `wix-animations` API in your code panel.
import { timeline } from 'wix-animations';Let's name our timeline so we know exactly what it does. I’ll start by declaring a timeline event, which we’ll store in a variable called “rotateTextTimeline”. There are many optional parameters within the timeline function, and in the example below, I’m using the “repeat” parameter and “-1” value to make my text rotate in an infinite loop.You can also insert a positive numerical value here to more clearly specify how you want your loop to rotate.
// rotate text
let rotateTextTimeline = timeline({repeat:-1})
Other optional parameters include:
repeatDelay: “number” — This number represents the delay between repetitions in milliseconds.
Yoyo: “boolean” — When set to true, this value reverses the animation after each iteration
Next, I want to select an element on the page that I want to apply my animation to. After adding the element to the canvas, I have the option to to change the ID of the element with the properties panel. This isn’t completely necessary, but I always like to rename every element I’m using to help keep everything organized. In this case, I’ve changed the ID to “#spinText”. We will use the $w( ) selector function to call it.

const spinningText = $w("#spinText")Now that I’ve selected the element, I can add it to the timeline with the .add( ) method. Remember that the Timeline API is controlling our animation sequence over time, so it’s essential that we add a value for the duration parameter. Within our .add() method, we need to pass the Wix element (`target`) in as the first parameter, with `animation attributes` or `movement` parameters passed in afterward. By default, each animation starts after the last one ends, but the `offset` parameter allows you to change this, starting an animation relative to the last animation added in the timeline. The offset is a numerical value represented in milliseconds. The structure is defined below:
.add( target, {animation attributes}, [offset] )

rotateTextTimeline.add( spinningText, {duration: 9000, rotate: 360, easing: 'easeLinear'} )
Here are a few animation attributes and their corresponding values:
Duration (required) | Number. Time in milliseconds. (1000 ms = 1s) |
Delay (optional) | Number. Time in milliseconds. |
Scale (optional) | Number. 1 being the original size of the element. |
scaleX (optional) | Number. Horizontal scale of target. |
scaleY (optional) | Number. Vertical scale of target. |
Opacity (optional) | Number. 0-1, 0 being transparent, 1 being opaque. |
Rotate (optional) | Number or String. 0-360 in deg. You can also add a relative value to the last position “+=” or “-=” |
rotateDirection (optional) | String. “cw” = clockwise or “ccw” = counterclockwise. |
X (optional) | Number in px on the x plan, horizontal movements. |
Y (optional) | Number in px on the y plan, vertical movements. |
Easing (optional) | Rate of one value to another (acceleration/deceleration), assume that each value will start at 0 unless specified otherwise. This value is a string so it must be in “quotes ”. I love using this cheat sheet for easing. |
Now that you’ve added animations to your timeline, you can use the .play( ) method to move the timeline forwards. This method is required for your animations to play. I’d add this in the $w.onReady( function () { ADD CODE HERE } function included in the code panel by default, so that your text rotates as soon as the page loads.
rotateTextTimeline.play()You can explore more functions included in the Timeline API here.
Make it Interactive
Now in an effort to increase engagement with our element, let's add an event to trigger that will fire when users interact with our element. Let’s say we want the spinning text to change direction when each user hovers over it.

To do this, we need to add an event handler to our target. I’ve added an “.onMouseIn( )” method to the spinningText element and called the “.reverse( )” method on the “rotateTextTimeline” variable we just created. In the “.onMouseOut( )” method, we call the “.play( )” method, which sets the timeline forward once again.
spinningText.onMouseIn(() => { rotateTextTimeline.reverse() })

spinningText.onMouseOut(() => { rotateTextTimeline.play() })
Saving Time
Now, we can use Animation Helpers available through Velo Packages with predefined timelines. This can help accelerate development even more. To add them to your Wix site, all you need to do is:
import { <functionName> } from '@velo/wix-animation-helpers'There is already a spin function defined in the API reference that looks like:
function spin(elements, { duration = 1000, direction = 'cw', easing = 'easeLinear', pause = false } = {})To simplify everything we just did previously, I could write:
spin('spinningText');To achieve the same animation timeline.
And that’s all there is to it! 😊
Your Turn!
I challenge you to recreate the following popular web animations with Wix and Velo:
Floating elements

Scrolling text

Button animations

Learn more about the Timeline API here: https://www.wix.com/velo/timeline-api. Have fun!


Comments