
These days, people are finding creative ways to digitally connect with others from within their homes - whether they video chat with family and friends, play music from their balconies, or create a website to spread the word about their business.
Live streaming may sound complex and technical, but it's actually a simple and highly accessible process for anyone. It's also a highly beneficial marketing strategy for engaging with new audiences and customers. Thanks to a wide variety of easy-to-use online platforms, you can produce your own live videos in a matter of minutes.
In this article, we’ll go over everything from the equipment you need to live stream to the best live streaming platforms. Then, we’ll dive into how to live stream on your website, YouTube, Facebook, and Instagram.

Live streaming equipment
Learning how to live stream isn’t difficult, but it does require a bit of hardware and software. Obtaining these various tools is sometimes a barrier to those interested in live streaming, simply because there are so many options and they don’t know where to begin. Here’s a very clear overview of the equipment you’ll need to get started:
Strong Internet connection. Be sure that the place you’re filming - whether it’s your home garden, exercise studio, or place of worship - has reliable internet connectivity.
Quality microphone. Rather than use the microphone on your laptop or mobile phone, you’ll need to get a professional microphone for clear sound and minimal background noise.
Good video camera. To improve the visual quality of your videos while staying within budget, opt for an HD webcam you can attach to your computer. You can also use the camera on your mobile phone, as long as you won’t require zoom. Alternatively, you can invest in a professional camera. Look into the types of cameras that are best for casual filming, such as handheld video cameras, or mirrorless and DSLR cameras.
Tripod. If you’re filming using a camera or your phone, you’re going to need a tripod to hold the device and keep the video steady.
Encoder. An encoder is a tool that takes your content and converts it into a streamable format for the web. Not every live stream platform requires an encoder, but it’s worth having to keep your options open. Streamlabs OBS is an encoding software that is easy to download and use.
Live streaming platforms
After you choose your equipment, you’ll need to familiarize yourself with the different live streaming platforms. You may want to upload to just one, but you can also upload to all of them to maximize your reach.
Popular live streaming sites include:
Your own website
YouTube
Facebook
Instagram
Your choice of platforms depends largely on your audience and goals. Using your own professional website as your live streaming platform allows you complete control over the way you display your content and shape your story.
At the same time, you can use live video as a social media marketing tactic. This is particularly useful if you’re a social media influencer and you want to promote your brand on Facebook or Instagram.
Pro Tip: You can use a link in bio tool such as Hopp by Wix in order to direct your audience towards all of your live streaming platforms as well as your website from one designated URL.
Let’s go over the steps for how to live stream on each of these different platforms:
How to live stream on your website
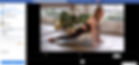
If you choose to broadcast your live video on your website, you can do so using Wix Video. This is an effective tool for sharing all types of video content, including live streaming fitness classes, religious services, online courses, Q&A sessions, concerts, and more.
By streaming directly onto your site, you can connect with users in real time. This is especially helpful if you're teaching online or if you want to give your audience feedback or answer their questions throughout your video.
Here are the steps for how to live stream from your desktop directly to your Wix website:
Download the live stream encoder from Streamlabs OBS.
Go to your Video Library, and click “Live Stream.”
Under “Go Live Now,” click “Desktop.”
Choose “I Have an Encoder.”
Select a Wix Video Channel for your live stream.
Add details about your video. Under “Video Info,” you’ll see options to add the title, cover image, description, and more. Under “Video Pricing,” you can choose whether to offer it for free or enable rental or purchasing. Then, click “Next.”
On the Connect Stream tab, copy the Server URL and Stream Key. Paste them both into the encoder.
On your computer, open the OBS Studio Encoder and click “Settings.” Then, click the “Stream” tab on the left.
Select “Custom Streaming Server” from the drop-down menu, and paste both your Server URL and Stream Key in the appropriate fields.
Click “OK.” You should see a feed from your camera in the encoder.
Now is the time you’ve been waiting for: Select “Start Streaming”
When you’re finished, be sure to click “Stop Streaming” on the encoder.
If you’d prefer, you can also live stream from mobile using iOS. Regardless of which device you use, your video will be automatically saved on your website, so you won’t have to worry about uploading it later.
Also keep in mind that even if you don’t want to live stream at this very instant, you can schedule your live streaming event by setting your start date and time in advance.
How to live stream on YouTube
For those interested in video marketing or vlogging, getting on YouTube is a must. While most of your videos probably won’t need to be broadcasted in real time, live streaming does come in handy for when you want to interact with your audience directly.
You can live stream on YouTube using your mobile phone, a webcam, or a separate camera. However, it’s important to note that you already need to be a successful YouTuber with at least 1,000 subscribers to be able to live stream from your phone.
If you’re using a camera, you’ll need to use an encoder to live stream on YouTube. Here’s how:
Enable your channel for live streaming by going to Creator Studio tools, then clicking the “Live Streaming” tab.
Download an encoder (if not using a webcam).
Click the upload icon - which looks like a grey video camera - in the upper right corner.
Click “Go Live.” This will take you to the Live Control Room.
Select “Live Stream” at the top of the page.
Add details about your video. You’ll have the option to enter a title and description, select a privacy setting, schedule your live stream, add a custom thumbnail, and more.
Start your encoder, then go back to the live dashboard.
Click “Go Live” on the right.
To end the stream, click “End Stream.”
Keep in mind that if you’re using a webcam rather than a separate camera, you don’t need to use an encoder to live stream on YouTube. Instead, you can simply click the grey video camera icon in the upper right corner, select “Go Live,” and then select “Webcam.”
How to live stream on Facebook
Another option is to broadcast from your Facebook account. Facebook calls its live streaming feature Facebook Live, a term you may have heard before. While YouTube restricts mobile video to channels with a high follower count, Facebook makes it easy for anyone to broadcast from their phones.
Facebook Live has exploded in popularity since its launch in 2016. Research has shown that the time people spend watching Facebook Live has quadrupled in the past year, with live videos generating higher engagement rates and performing better with Facebook’s algorithm.
Here’s how to live stream on Facebook directly from your phone:
In the Facebook app, tap the camera icon to the left of the search bar.
Give Facebook access to your camera and microphone when prompted.
Switch to “Live” at the bottom of your screen.
Select your privacy and posting settings.
Now, add some details: Write a description, choose a location, tag your friends, and more.
Add lenses, filters, and drawings to your upcoming video by tapping the magic wand icon.
Click “Start Live Video,” and start broadcasting! Note that you can broadcast for a maximum of 90 minutes.
To end the broadcast, click “Finish.”
If you wish, click “Post your video replay” so that your video gets published on either your personal wall or Facebook Business page.
If you’re broadcasting from your webcam, the process is quite similar. Just go to Facebook, click the “Write something” box, and tap the “See All” option in the menu. From there, you can click “Start a Live Video.”
How to live stream on Instagram
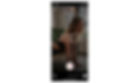
Now for our final live streaming platform: Instagram. You can think of live streaming as a longer version of Instagram Stories. Instagram live videos are meant to be light, casual, and fun, rather than professional. They show your audience what you are doing right now, and in doing so gives them a behind-the-scenes glimpse into your life.
Not only is this an effective way to promote your videos, but it’s also an important strategy to build authentic relationships with your viewers so that they can get to know the individual behind the personal brand, or everything that makes your company unique.
As with everything else on Instagram, you take live video directly from your mobile phone. This is how to do it:
Tap the camera icon in the top left of the feed. Alternatively, you can swipe right from anywhere in the feed.
Scroll to “Live” at the bottom of the screen.
Tap the circular recording button. You’re now broadcasting live!
When you’re finished, tap “End” in the top right.
If you wish to share a replay of your live video, you can post it on your story by tapping “Share to Story.” You can even add hashtags and location stickers to your story to make it discoverable. Keep in mind that like all Instagram Stories, it will disappear in 24 hours.
That’s all there is to it!
Live streaming best practices
While each of these platforms operates a little differently, they do require similar techniques for maximizing your success. Regardless of the platform you choose, you should keep the following strategies in mind:
Know your audience. From the platform you choose to the time you stream your video, every aspect of your broadcast should reflect the interests and preferences of your audience. Be sure to stream your video at a time that’s convenient for your users, and on a platform that’s easy and intuitive for them to use. You should also make sure that the style and tone of your video reflects your brand identity. Whether you opt to keep it casual, professional, or inspirational, speak to your audience in a way that resonates with them.
Promote your event. Schedule your event ahead of time, and promote it so that your audience knows when and where to show up. Be sure to announce your event on a variety of channels, such as your website, social media pages, email newsletters, printed flyers, and more.
Practice beforehand. While your live video shouldn’t sound scripted, you should make a mental note of what you’re going to say. Before you hit that stream button, jot down some bullet points and rehearse your presentation. You should also double check to make sure your internet connection is strong, your equipment is working smoothly, and your environment is free of distractions. Even if you’re shooting a casual Instagram video, scoping out your surroundings can help you avoid any mistakes or awkward moments.
Interact with viewers. What makes live streaming such a popular and effective tool is that it allows you to engage with your audience real-time. In other words, your viewers can leave comments during your video, and you can respond right away. This is the primary benefit of live streaming a video, rather than simply posting it. Be sure to do this, as it fosters a sense of community and brings viewers closer to your brand.
Follow up. Even as your video draws to a close, you’ll want to maintain the connection you’ve just built with your audience. Keep the momentum going by telling your viewers where they can get more information, providing them with additional resources, and sharing your contact details. If your goal is to promote a specific offer or service, you can also provide them with a link to a relevant landing page. If you’re planning to live stream again, be sure to announce that, too.
Edit and manage your content. Once you’ve stopped filming, you may be perfectly fine posting your video as is. However, if you want your content to appear more professional, you’ll probably need to make some minor edits. Save your video to your computer, and use a video editing software - such as the Wix Video Maker - to trim off any glitches, add titles and video captions, and more. You can also try these simple video tips to enhance your content even further. Then, upload your edited video to your website and other platforms of your choice.
Congratulations! You now know how to live stream. Remember to gather the right equipment, choose the platform that’s best for your organization and your audience, and captivate your viewers with real-time interaction. By methodically following these steps, you’ll be able to hit the ground running in no time.