- Ruth Kogan

- Dec 18, 2025
- 11 min read
Updated: Jan 27

Invitations set the tone for any occasion. Creating invitations is more than just choosing a design—it’s about setting the tone for an event, engaging your audience and crafting a keepsake that people will cherish. For some events, adding online RSVP makes planning even easier. Whether it’s a wedding, a baby shower, a business event or a birthday party, your invitation is the first peek your recipients will get into what you’ve planned.
This article will guide you through creating engaging, memorable invitations, no matter your design experience. From defining your purpose to reviewing the final touches, you'll learn how to create invites that are as unique as the event they represent.
New to design? Discover what is graphic design and some basic design principles to help you get started.

Make every celebration unforgettable with our customizable invitation maker. Explore a variety of invitation designs and personalize every element to match your unique style and event theme.
TL;DR: How to make invitations
Designing invitations is a creative process that sets the tone for your event. Whether you're planning a wedding, birthday or corporate gathering, follow these steps to craft the perfect invite:
Step | What to do | Why it matters |
1. Define purpose and theme | Decide on the event's purpose and choose a theme that reflects its tone and style. | Ensures your invitation resonates with the event's vibe and audience. |
2. Select an invitation maker | Choose a tool like Wixel for templates, drag-and-drop features and customization options. | Simplifies the design process, even for beginners. |
3. Pick an invitation layout | Arrange text, images and decorative elements in a balanced and visually appealing way. | Creates a clean, professional look that’s easy to read. |
4. Use colors and fonts | Select a cohesive color palette and readable fonts that match your theme. | Sets the mood and ensures clarity for your audience. |
5. Add illustrations/icons | Incorporate visuals that align with your theme, like icons or custom illustrations. | Makes your invitation unique and engaging. |
6. Include essential info | Add key details like event name, date, time, location, RSVP instructions and any special notes. | Provides all the necessary information for your guests. |
7. Review and save | Proofread, refine the design and save in the appropriate format (PDF for print, JPEG for digital). | Ensures a polished final product ready for sharing or printing. |
Explore the best invitation makers to design stunning invites in minutes.
How to make invitations in 7 steps

01. Define the purpose and theme of your event
Every great invitation starts with a clear purpose and theme. The purpose of your invitation could range from a formal gala to a casual backyard barbecue. Defining this from the outset ensures your design will resonate with the recipients.
The theme, on the other hand, is your chance to infuse personality and style into your invitation. If you're understanding how to create a wedding invitation you might lean towards elegance and subtlety, particularly when designed with a wedding invitation maker, while a birthday bash could flourish with bold, vibrant colors. If you're hosting a corporate event, think about creating a layout that conveys professionalism while still catching the eye.
Learn more:
02. Select an invitation maker
Before you start designing, choose an invitation maker that aligns with your skill level and needs. For those seeking effortless digital design, platforms like Wixel are incredible, offering user-friendly interfaces tailored for beginners and experts alike.
Look for a tool that balances flexibility with simplicity. If you're new to design, search for a platform with built-in templates, auto-alignment tools and drag-and-drop functionality. If you're a bit more advanced, aim for one that gives you the freedom to develop your design from scratch, while still offering technical support features.
Choosing the right platform will save time, reduce frustration and ultimately empower you to turn your vision into reality. By teaming up with a platform like Wixel, you’re setting the foundation for a polished, professional design.

03. Pick an invitation layout
The layout is the foundation of your design. Decide on the size of your invitation (we’ll get into dimensions later) and how you want to arrange the text, images and decorative elements. Look for balance—leave enough white space for a clean, readable design.
Tools like Wixel often come with templates to inspire you, complete with filters for colors, style and free vs. premium options, so you don’t feel like you need to create everything from scratch.

04. Use colors and fonts to set the mood
Colors and fonts aren’t just decorative—they drive feelings, set expectations and communicate the vibe of your event. Color theory plays a key role in this, helping you choose the right palette to set the tone. A pastel palette with soft serif fonts might capture the elegance of a baby shower, while bold metallics paired with a sleek sans-serif typeface scream sophistication for a launch party.
According to Yaya Aaronsohn, head of Brand Maker at Wix:
"Each combination of design elements has the potential to evoke specific emotions, convey subtle messages and leave a lasting impression on viewers. From the choice of font to the selection of colors and the incorporation of graphic elements, every detail plays a crucial role in shaping the overall identity of a brand."
Start with your purpose and theme as a guide. For colors, it’s often helpful to pick three hues—a dominant color, a secondary color and an accent—ensuring cohesive design. Platforms like Wixel have color palette generators that include pre-designed color palettes optimized for different tones and moods.
When it comes to fonts, readability is important. Use no more than two fonts to maintain clarity—one for headers and one for body text—and make sure text sizes are legible across different devices or if printed. A bold, approachable font for your main title, paired with a minimal font for the details, often creates a harmonious balance.
Learn more about what is typography to pick the best font for your next invitation.
05. Add custom illustrations or icons
Illustrations and icons bring life to your invitation. They can reinforce your theme, spark interest and make your design uniquely "you." Imagine foliage illustrations framing a wedding invite or playful balloon icons highlighting a children’s birthday party.
One way to find the right illustrations is to align them with your event's narrative. A beach party could feature wave patterns or sunbursts, while a tech conference could use sleek, geometric shapes. Tools like Wixel's party invitation maker often include a library of customizable icons to suit any occasion.
If you're creating a more unique or personal event, you could also sketch your own illustrations or collaborate with a designer. Adding original touches ensures your invitation stands out and creates a lasting impression.
06. Include the essential information
Your invitation wording should be informative and easy to read. Write everything in a way that fits your event’s character. A business meeting might take a more formal tone, while a kids' party can use playful and colorful language.
Make sure it includes:
Event name and purpose
Date and time
Venue details
RSVP instructions
Additional details like dress codes or special instructions
07. Review, refine and save
With the bulk of your design completed, it’s time to refine. First, carefully review your text for errors or inconsistencies. Double-check details like dates, spelling and font sizes to ensure uniformity.
Next, step back and assess your design as a whole. Does the layout feel balanced? Are all elements aligned properly? Tools like Wixel typically offer alignment guides and zoom features for precise editing.
Finally, preview your invitation across different devices if it's digital, or opt for a trial print if it’s physical. This will help you spot any overlooked elements and ensure your final version meets your standards. Once you’re happy with the result, save your file in the appropriate format—PDF for printing or JPEG/PNG for online sharing.
Invitation dimensions
Standard sizes vary depending on the purpose and printing methods, but here are the most common dimensions to consider:
4 x 6 inches (A6): Easy to mail and great for casual invites.
5 x 7 inches (A7): Perfect for semi-formal events like weddings or showers.
6 x 8 inches: Often used for larger, more luxurious designs.
Digital invites are usually made for shared formats like email and WhatsApp, so they are often optimized for screen dimensions.
Sharing digital invitations
Digital invitations are all about mixing creativity with convenience. They’re a modern, eco-friendly option that’s especially handy if you’re on a tight timeline or want to save on costs.
The rise of digital invitations is not just a trend, but a necessity, with the electronic invitation market growing at a 15% CAGR from 2025 to 2033. This shift highlights the convenience and eco-friendliness of digital invites.
Digital invitations offer several benefits that can make event planning a breeze:
Cost-effective: You don’t need to worry about printing or postage expenses. Just design and send.
Quick delivery: Perfect for last-minute planning, digital invites reach your guests in moments.
Eco-friendly: Save paper and reduce waste by sending your invites electronically.
Easily editable: Mistake in the details? Need to update the time or location? Edit and resend anytime with no extra hassle.
Where to send your digital invitations
Once you’ve finished your design, it’s time to share it with your guests. Here are some of the best platforms to get your invitations out there:
Email: Great for formal events. Send your invite as an image in the email body or attach a PDF.
Messaging apps: Share informal invites via WhatsApp, iMessage or Facebook Messenger. Save your invite as an image for easy sharing.
Social media: Create private events on platforms like Facebook, or upload your invite to your Instagram close friends list for greater reach.
Event platforms: Combine your digital invitations with event management tools, such as Google Forms or Evite, to manage RSVPs efficiently.
Pro tip: Optimize your invites for mobile-friendly viewing. Most guests will likely view them on their phones, so choose dimensions like 1080 x 1920 pixels for the best results.
Tips for designing your digital invitations
Use clear fonts and contrast: Opt for bold lettering and high-contrast colors to ensure your text is easy to read.
Include animations: A touch of movement, such as subtle animations, can give your invite a modern and polished feel.
Export in the right formats: Save your design as a JPEG or PNG for visuals or a PDF for easy emailing. Wixel makes it super simple to work with these formats.
Add clickable links: Make responding a breeze by including links to RSVP forms, directions or additional event details.
Making RSVPs a breeze
RSVPs can be one of the trickiest parts of event organizing, but digital tools make it simple:
Add RSVP links: Direct your guests to an RSVP form using clickable links. Google Forms, Typeform or any RSVP-enabled Wixel design works perfectly.
Use QR codes: Want to go the extra mile? Add a scannable QR code that leads directly to your RSVP page.
Send follow-up reminders: Many email tools allow you to schedule gentle reminders, keeping your headcount accurate without additional effort.
Printing and distributing invitations
If you’re set on creating physical invitations or want to complement your digital ones with print copies, here’s what to keep in mind.
Understand your print needs
Printed invitations introduce a special tactile element that can’t be replicated digitally. To get the best results:
Choose the right material: The paper stock you use can instantly enhance the feel of your invitation. Think about what represents your event’s vibe best—classic matte, upscale glossy or textured papers that give a handcrafted touch.
Focus on finishes: Elements like foil stamping, embossing or unique die-cuts can elevate the look and feel of your design.
Work with your printer
For a flawless finish, send your design to a professional printer in a print-ready format, like a high-resolution PDF with detailed instructions. Key considerations include:
Color settings: Stick to CMYK for accurate color reproduction.
Bleed margins: Discuss these with your printer to ensure your design extends exactly to the edge of the card.
Special instructions: Specify finish preferences or extra embellishments to ensure your vision is brought to life.
Distribute your invites
Mailing etiquette: Send physical invites at least 3-4 weeks in advance, giving guests plenty of time to RSVP and plan. If your event is more formal or requires travel, consider mailing them 6-8 weeks ahead.
Presentation matters: Protect your invitations with matching envelopes and consider extras like wax seals, liners or handwritten calligraphy for a sophisticated touch.
Leverage digital RSVPs: Even with printed copies, include a link to a digital RSVP page or a scannable QR code to simplify confirming attendance.
Invitation examples from Wixel
Different events require different types of invitations. No matter what type of invitation you’re making, ensure it aligns with the tone of your event. Get started with these invitation templates from Wixel for your next big event:
01. Baby shower invitations


Make a splash with our adorable baby shower invitation templates—your perfect welcome to the little bundle of joy.
02. Bachelorette invitations


Celebrate in style with our stunning bachelorette party invitation templates—the perfect way to kick off the bride-to-be’s special night.
03. Baptism invitations


Celebrate this special day with our baptism invitation templates—designed to be perfect for the occasion.
04. Birthday invitations

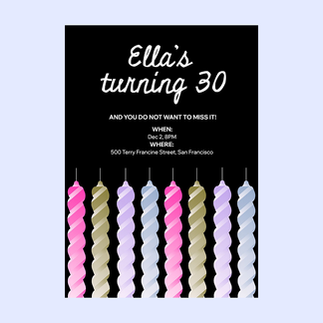


Make your party pop with our fun and easy birthday invitation templates.
05. Brunch invitations


Take your brunch gathering to the next level with our stylish and easy-to-use brunch invitation templates.
06. Gender reveal invitations


Create an unforgettable moment with our gender reveal invitation templates – the perfect way to share the big news.
07. Graduation invitations


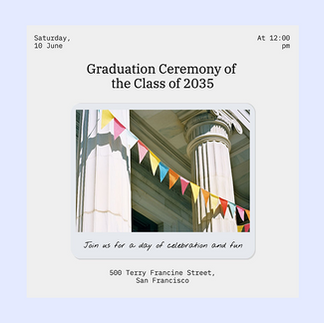


Grad-iators, celebrate your big day in style with our customizable graduation invitation templates.
08. Wedding invitations


Say "I do" to the perfect wedding invitation templates—start designing your dream invites today.
Discover more of Wixel’s card templates:
Additional design projects to explore:
How to make a banner that communicates your message perfectly
How to make a book cover that captures readers at first glance
How to make a flyer that captures attention and delivers your message
How to make a gift card for any occasion
How to make an infographic that captivates and informs your audience
How to make labels that are functional and beautiful
How to make a mood board that inspires your best creative work
How to make a poster for impactful displays
How to make a slideshow that keeps viewers focused
How to make a YouTube banner that captures your channel's personality
How to make YouTube thumbnail that boost clicks and viewer engagement
How to make invitations FAQ
Can I create invitations digitally?
Yes, digital invites can be emailed or shared via social platforms, saving you time and printing costs.
How much time should I allocate to designing an invitation?
Depending on your event, it could take anywhere from a few hours to a few days. Start early so you have room to refine your design.
Should I use a professional printer?
Professional printers are best if you want a polished look—especially for events like weddings or business launches. Look for print services with high-quality paper options and clear communication about your design specs.
What type of paper should I use for printing?
The type of paper you choose depends on the tone and style of your event. For a luxurious feel, opt for thick, textured paper like cardstock or linen. If you want something more modern, glossy or semi-gloss paper can make colors pop. Always consider the durability and finish that best match your design.
How to design my own invitations with Wixel?
01. Open Wixel and click “Invitation maker” to start designing your custom invitation.
02. Choose a template that matches your event style or theme.
03. Personalize your invitation by adding event details, photos and colors.
04. Review your design carefully to make sure all details are accurate.
05. Share online or print your finished invitation to send it to your guests.
How can I create my own birthday invitations for free?
01. Go to Wixel's Birthday invitation maker to start making your own birthday invitations for free.
02. Browse the birthday invitation templates and choose one that fits the theme of your party.
03. Enter your event details, including the birthday person’s name, date, time, location, RSVP info and any special instructions to create personalized birthday invitations.
04. Customize colors, fonts, images and other design elements to make your invitations unique and eye-catching.
05. Review all the details and design to ensure your invitations are accurate and visually appealing.
06. Download or share your birthday invitations online to send them to your guests.


