- Oct 24, 2018
- 3 min read
Updated: Apr 16, 2024
This is a shout out to all of us perfectionist designers out there: sometimes, it’s the imperfections that make things all the more interesting. Knowing this, many designers today share progress pics or videos of their work before it reaches its final, polished state, drawing more and more eyes to the widespread hashtag of WIP (Work in Progress). Yet others still find it difficult to release their incomplete doodles and scribbles to the scrutiny of others. If that’s the case for you, too, consider this a little encouragement boost from us. Here’s how to spark your followers’ curiosity with a peek into your half-baked creations, followed by a few tips on how to get it done right:
Designer and Wix user Valeria Monis shares her ceramic painting process.
Why share WIP pics?
– Form a stronger bond with your followers:
Since social media today is all about emotion, you want your feed to evoke the right kind of feelings with your fans. Sharing your WIP is a great way of looping your followers in on the behind-the-scenes of what you do, and creating a sense of familiarity and intimacy. By having fans glimpse at your rough drafts and less-than-perfect sketches, you can make yourself seem more relatable, and your fans will feel more engaged and in the know.
– Show followers how you do what you do:
Our personal methods of working might seem obvious to us, but we each have our own preferences and small design hacks that work so well for us – and could also help others. Followers might find some clues into the way you work in your progress pics, by spotting the type of pen that you use, or the way you set up your photoshoots. Even without getting too scholarly or instructive, sharing simple snapshots of how we work can help other creatives learn and grow, and add to the shared pool of knowledge that we all enjoy as creatives.
How to share your work in progress
– Zoom out:
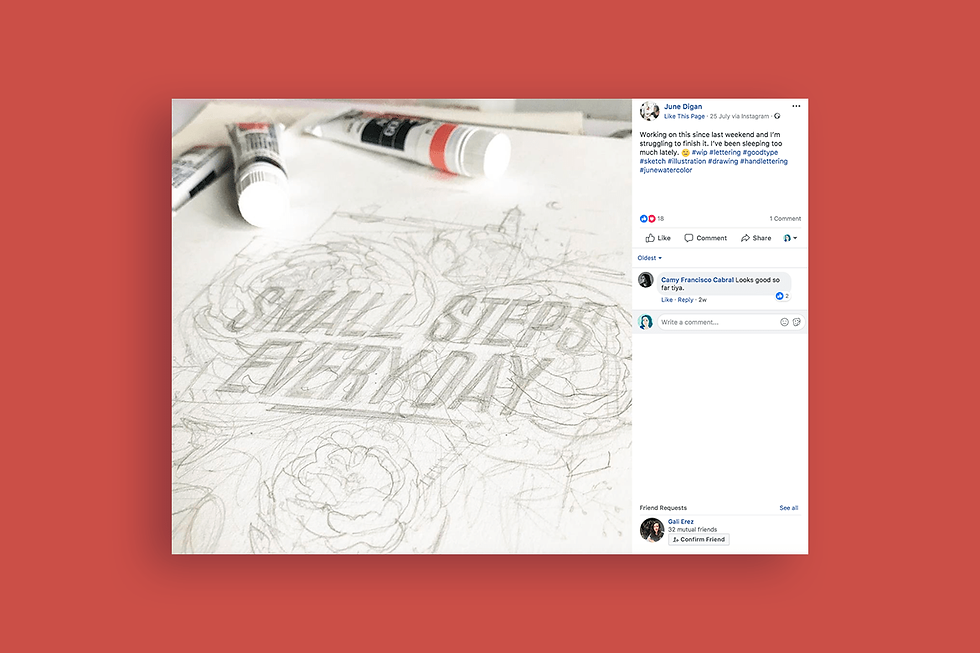
Work-in-progress shots are an opportunity for you to show more than just the design itself. Include some of the tools that you use, your work space, or anything else that you find interesting or fun. For illustrator and Wix user June Digan, this means sharing the acrylic gouache paints that she uses for coloring in her hand lettering pieces.

– Zoom in:
Use your WIPs to share tiny details or close-ups of textures and materials from pieces you’re currently working on. This Instagram video by artist collective Ghostown takes you through the process of creating a woodcut print, highlighting all the manual aspects that go into this ancient craft.
– Explain what you do:
Create impromptu tutorials showing your step-by-step work process, enabling others to learn a few tips from your expertise. Argentinian industrial-designer-turned-illustrator Elebea shares her tricks of the trade on her Instagram stories, revealing everything from her initial hand-drawn sketches, to the tracing of the illustration on her tablet and even down to the technicalities of exporting the final file.
A digital drawing tutorial by illustrator and Wix user Elebea.
– My project, the prequel:
WIPs can work the other way around, too. Sharing pictures of drafts or sketches from a project that you’ve already completed and that your fans are already familiar with, can add extra value. Scroll through this carousel post by illustrator and Wix user Naomi Wilkinson to see how her final illustration compares to its early sketches.
– Show the extras:
Work in progress videos can also mean a quick flip through your sketchbook, a display of different color palette options or anything that is going through your mind – and screen – at the moment.
– Share time lapses:
Show your creative process in action with time lapse videos or Instagram stories that advance alongside your design progress. The time lapses that French illustrator and Wix user Sarah Andreacchio shares on her Instagram feed invite her followers to admire her brush work, and more importantly, feel like a part of her creative process.
– Unveil the results:
After sharing your work in progress, don’t forget to follow up and give your fans the satisfaction of seeing the finished pieces once you have them. After sharing her gouache still-life in the making (see above), Sarah Andreacchio makes sure to show off the final painting, too. She then wraps it all up with its installation view of the framed original starring in an art exhibition in all its glory.
– Include a CTA:
Now that your followers are intrigued, invite them to find out more with a call-to-action and send them over to your online portfolio or art store with a link.


