Wix Editor: Adding and Setting Up a Strip
4 min read
Use full-width strips to structure your content and break it into horizontal sections, creating a professional feel. Choose from a variety of elements to add to your strip, then customize the strip background using color, image or video.
In this article, learn how to:
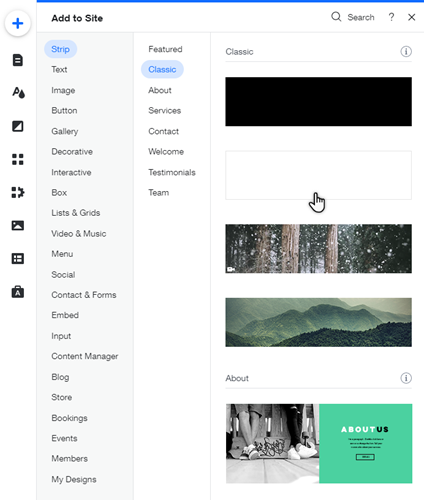
Adding a strip
Add a strip to begin structuring your page.
You can use strips to divide your page's content and information. Popular ideas for strips include contact details and price lists.
To add a strip:
- Click Add
on the left side of the Editor.
- Click Strip.
- Select the type of strip you want to add.
- Drag a strip element onto your page.
Tips:
- Strips look particularly great on one-page sites.
- You can add another one by clicking the Add strip icon
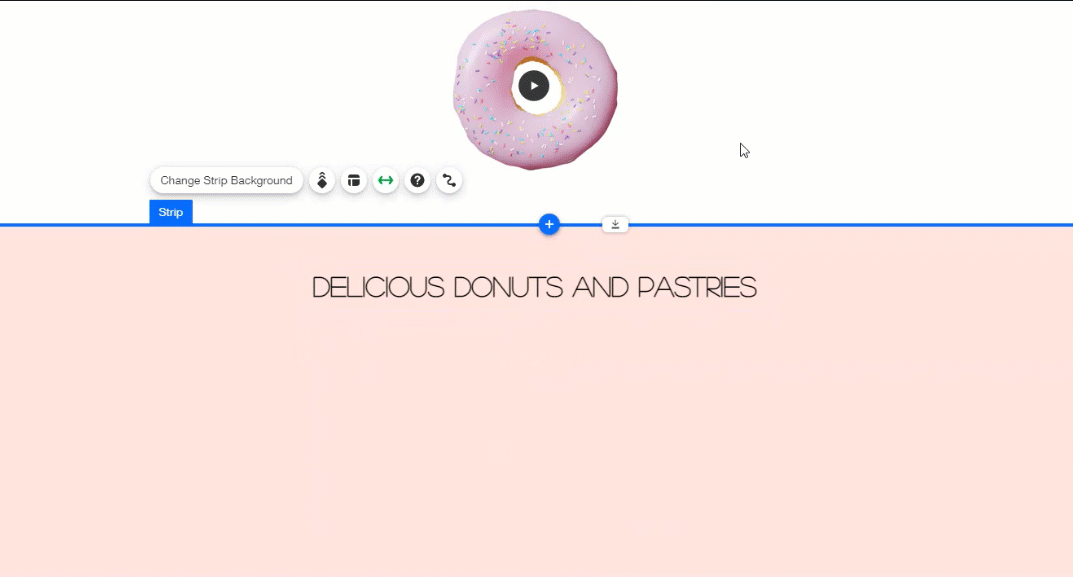
Adding elements to your strip
Build your strip by adding relevant content.
Once elements have been attached to your strip, you can easily move the strip and elements around your site pages.
Before you begin:
Resize the strip or element so the element fits within strip before trying to attach it.
To add elements to your strip:
- Drag the element over the strip.
- Drop the element when you see the message Attach to Strip.
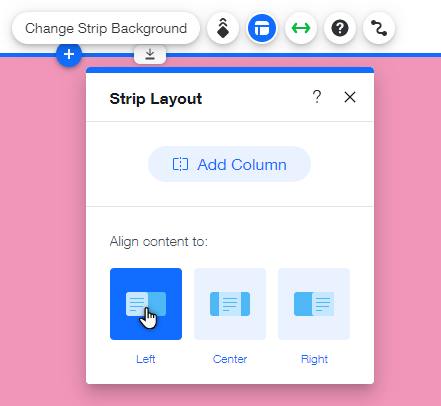
Adjusting the alignment of your strip
Choose how the content of your strip is aligned on your site to ensure that your visitors can always view important and relevant information. You may want to change the alignment to organize your content in a different layout.
Important:
You can only change the alignment of strip content if the strip doesn't contain columns.
To adjust the strip alignment:
- Click the strip in your editor.
- Click the Layout icon
 .
. - Select a layout:
- Center: The content is aligned to the center of the strip.
- Left: The content is aligned to the left of the strip.
- Right: The content is aligned to the right of the strip.
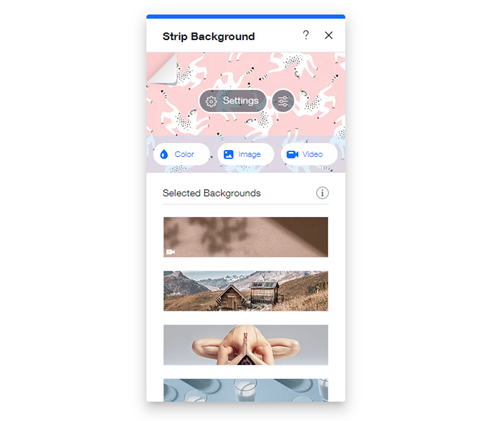
Designing your strip background
Choose a background for your strip to suit your site's look and feel.
There are a variety of options available. You can choose from a range of colors, images, or videos.
To change your strip background:
- Click the strip in your editor.
- Click Change Strip Background and choose from one of the following options:
- Color: Choose from a range of colors to either match your site's palette, or create something bold.
- Image: Select from a variety of striking free images, or upload your own.
- Video: Choose a free eye-catching video from Wix, or upload your own through the Media Manager.
Important:
A strip automatically spans the width of your site, however you can change the width by clicking the Stretch icon  . The maximum height for a strip is 15,000 px.
. The maximum height for a strip is 15,000 px.Did this help?
|