Wix Editor: Managing Your Site's Pages
5 min read
Manage your pages to keep your site organized and sophisticated.
You can add and delete pages within the Editor, as well as perform actions such as setting transitions and changing the page order.
In this article, learn how to:
Tip:
Easily navigate to different pages by clicking the Switch Pages panel on the top bar of the Editor. Learn more about navigating between pages
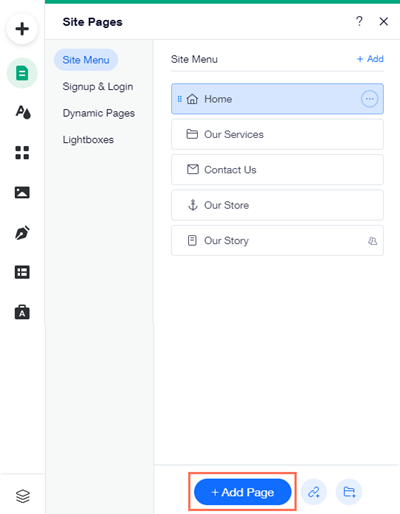
Adding new pages
Build your site by adding new pages. They can be added from the left side of the Editor, and are automatically added to your site's menu.
You can add up to 100 static pages to your site. Add a blank page to start from scratch, or use one of our professional page templates to get a head start on the design. These templates are divided by topics and include all the elements you need. Learn more about adding pages
To add a new page to your site:
- Click Menus & Pages
 on the left side of the Editor.
 - Click + Add Page at the bottom of the panel.
- Do one of the following:
- Add a blank page: Click Blank Page + at the top left.
- Choose a template: Hover over the design you want to use and click Add Page.
- Enter the new page name in the Pages panel.
- Click Done.
Want to add more pages?
The 100 page limit does not apply to dynamic pages, such as product pages, blog posts, and pages connected to your CMS (Content Management System).
Important:
Although you can add up to 100 static pages to your Wix site, keep in mind that sites with a large amount of pages may take longer to load. Learn more about creating a multi-page site
Deleting pages
Delete pages from your site that you've previously created from the Pages panel on the left side of the Editor. Learn more about deleting a page from your site
To delete a page from your site:
- Click Menus & Pages on the left side of the Editor.
- Hover over the relevant page and click the More Actions icon
 .
. - Click Delete
 .
.
Just want to hide a page from visitors?
Hide pages from your site menu without deleting the page. Learn how to hide pages from your site menu
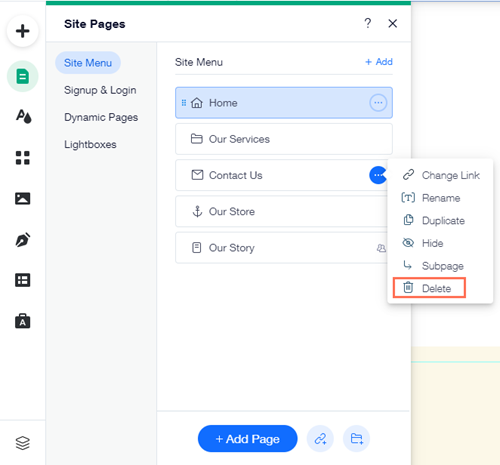
Important:
If a page is linked to a Wix app (e.g., Blog, Stores, etc.), deleting the page also removes the app.
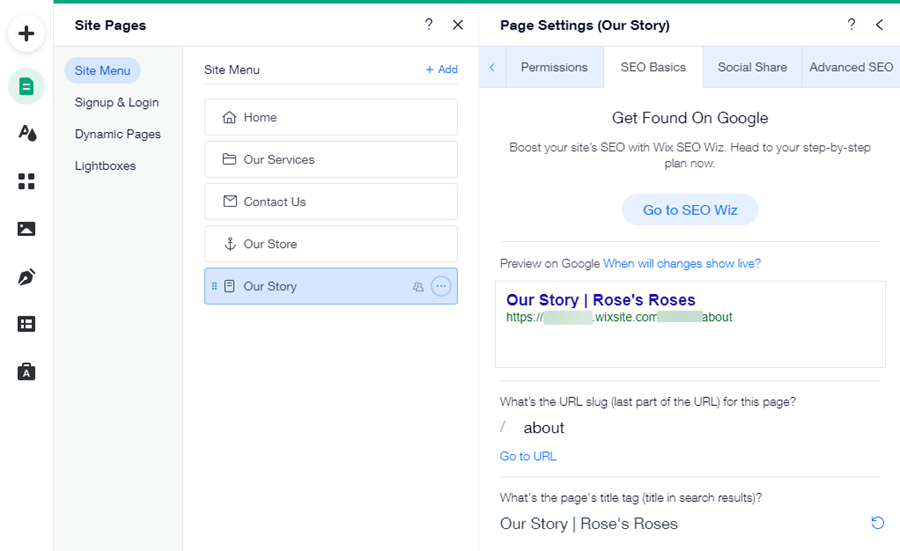
Adjusting page settings
Set up your page to ensure it has all the relevant information and settings. There are a variety of tabs to explore, such as privacy, SEO, and permissions. Learn more about your page settings
To change your page settings:
- Click Menus & Pages on the left side of the Editor.
- Hover over the relevant page and click the More Actions icon
 .
. - Click Settings.
- Click the tabs to adjust the page settings: Permissions, SEO (Google), Social Share and Advanced SEO.
Note:
The available settings displayed depend on the type of page you are setting up.
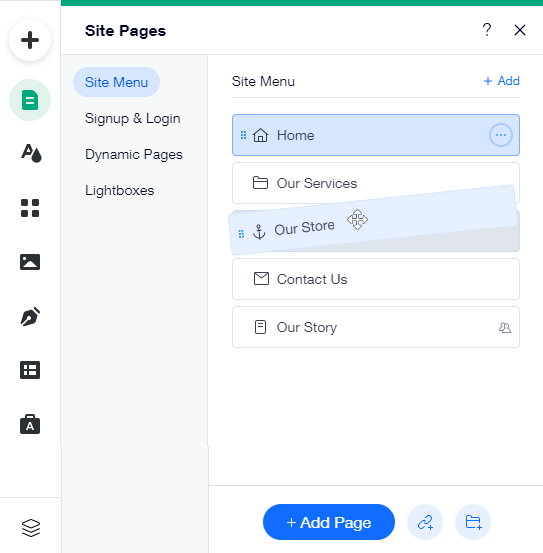
Reordering site pages
Reorder your site's pages to display them in whatever order you'd like on the site menu. It's a great way to draw attention to the most important or relevant pages on your site.
To change the order of site pages:
- Click Menus & Pages on the left side of the Editor.
- Click the reorder icon to the left of the page name.
- Drag the page up or down the list.
Setting page transitions
Page transitions determine how your site moves from page to page. You can make your pages glide horizontally or vertically, fade out or disappear as visitors navigate to the next page. This can create a fun and lively navigation experience for your visitors.
To add a page transition:
- Click Site Design
on the left side of the Editor.
- Hover over Page Transitions and click Customize.
- Select a transition for your pages from the following options:
- Horizontal: Page glides along a horizontal axis.
- Vertical: Page glides along a vertical axis.
- Cross Fade: Page fades into view.
- Out-In: Page disappears before a new page appears in its place.
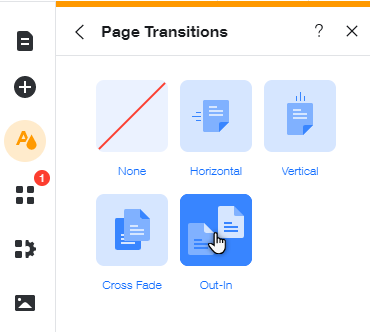
Tip:
Click None in the transition options to remove a page transition.
Want to print a site page?
Press Ctrl+P on your keyboard, or you can take a screenshot of the page and print it.
Did this help?
|